So you want to create your first TIlBuci movie, right? No problem, this guide will teach you the first steps of the software. Click at the pictures to expand the view.
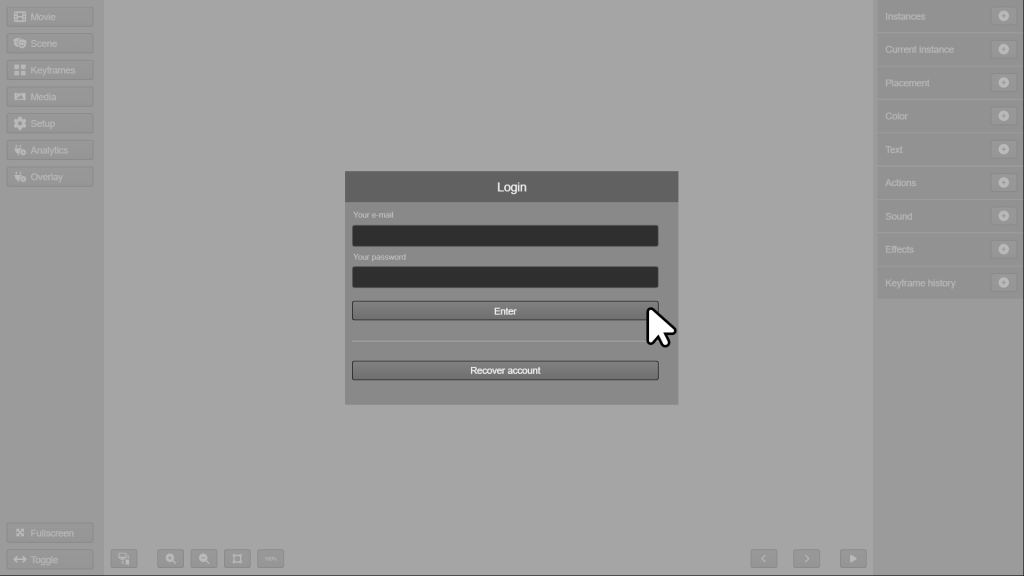
The first thing to do is access your TilBuci installation and enter your credentials. If you are using the software in single-user mode, you are ready to go!
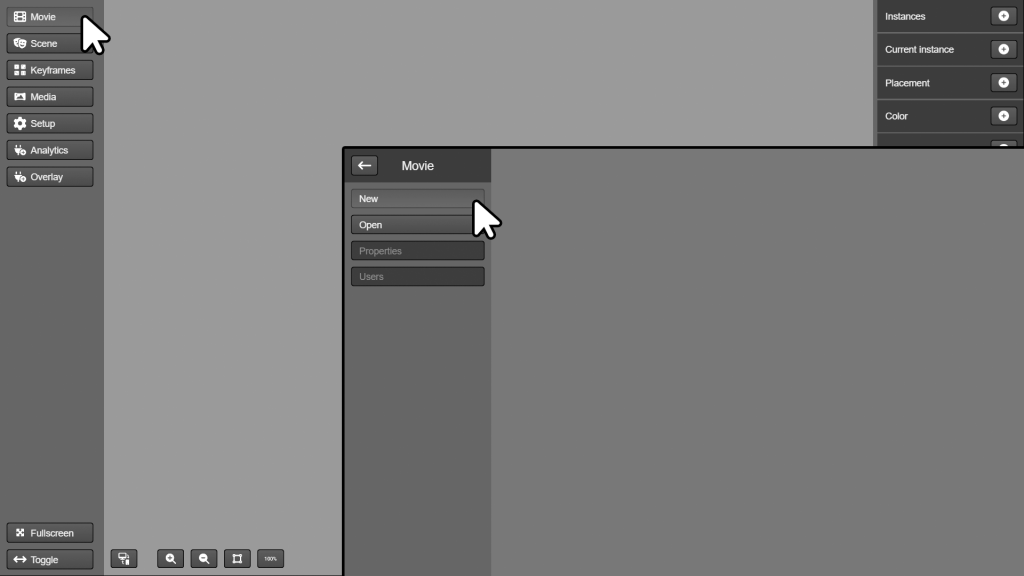
Any project created in TilBuci, from a simple web page to a presentation or even an electronic magazine or narrative game is called a movie. To create a movie, select Movie > New from the left menu.
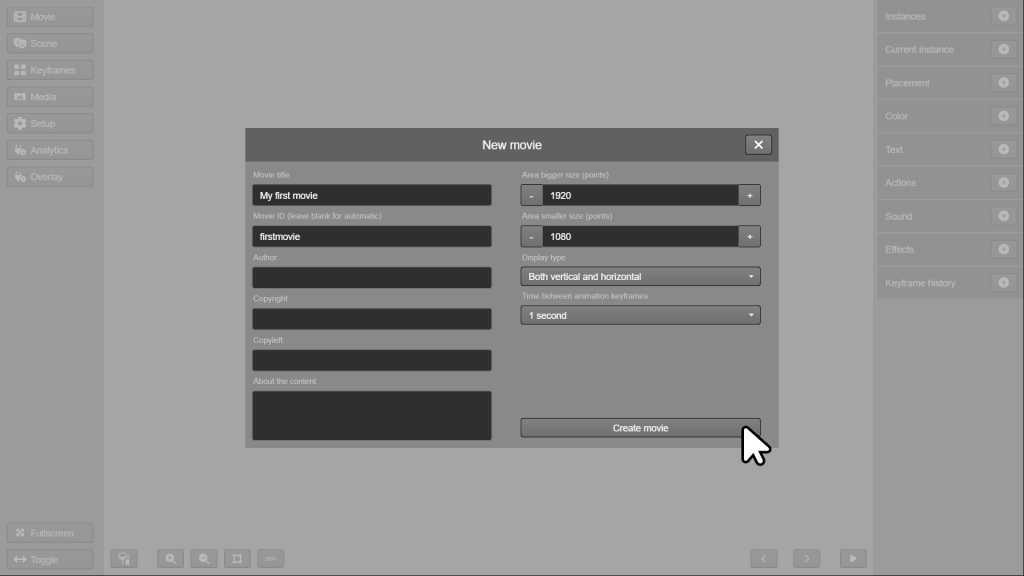
The new movie configuration window will appear. In it, you will need to indicate some information, such as the title of your creation and an identifier. Try using a simple word for the identifier, without spaces or special characters.
You can also indicate your name, copyright and copyleft notes and a description.
The next step is to indicate the size and screen format of your creation. By default, TIlBuci understands that your movie can be viewed on both horizontal and vertical screens. Let’s keep it that way for your first film. Click the Create movie button.
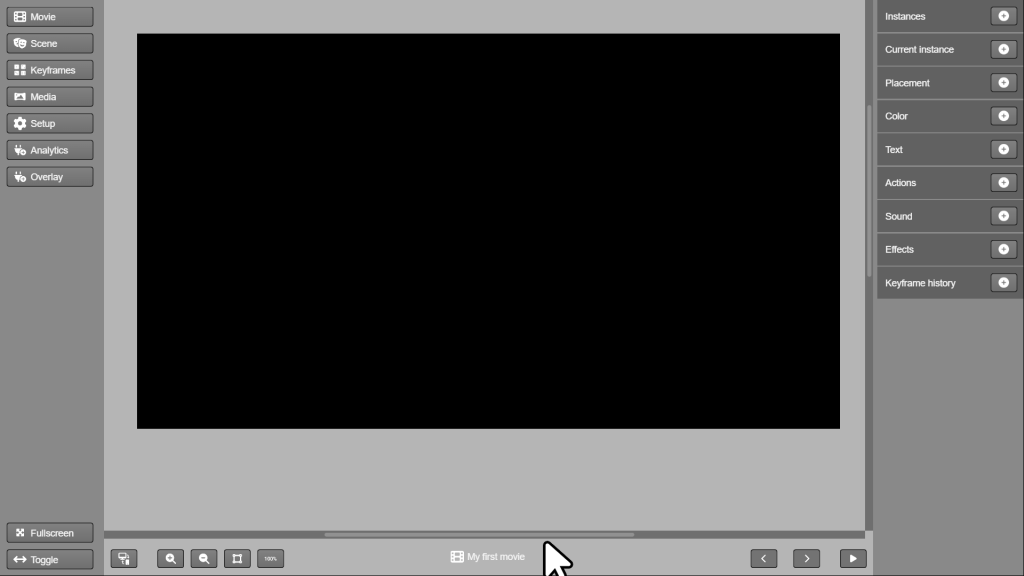
That’s it, your first film has been created! Note that the title of your project appears at the bottom of the screen. Movies created in TilBuci are made up of scenes. The time has come to include your first one.
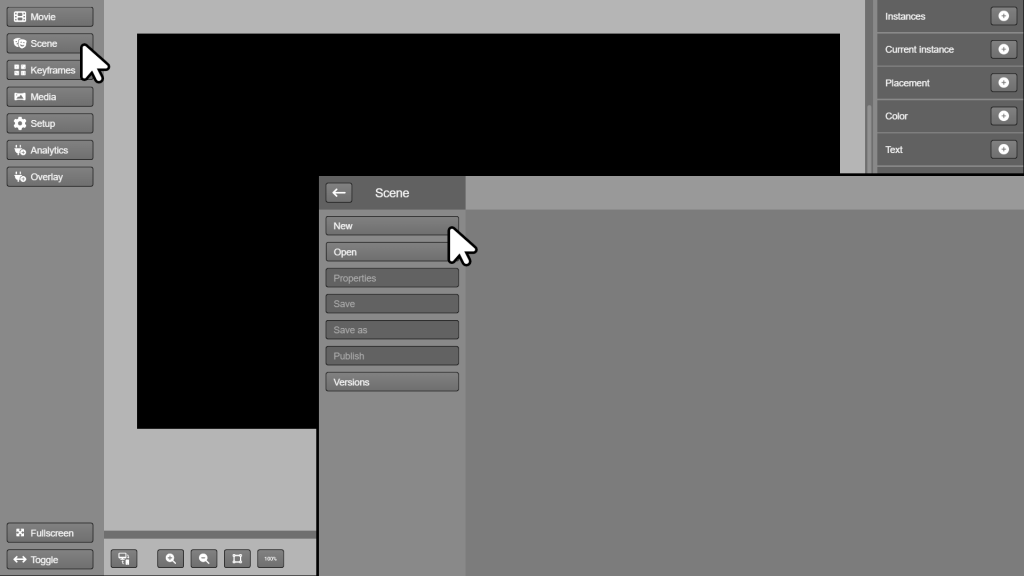
Go to the left menu and click Scene > New.
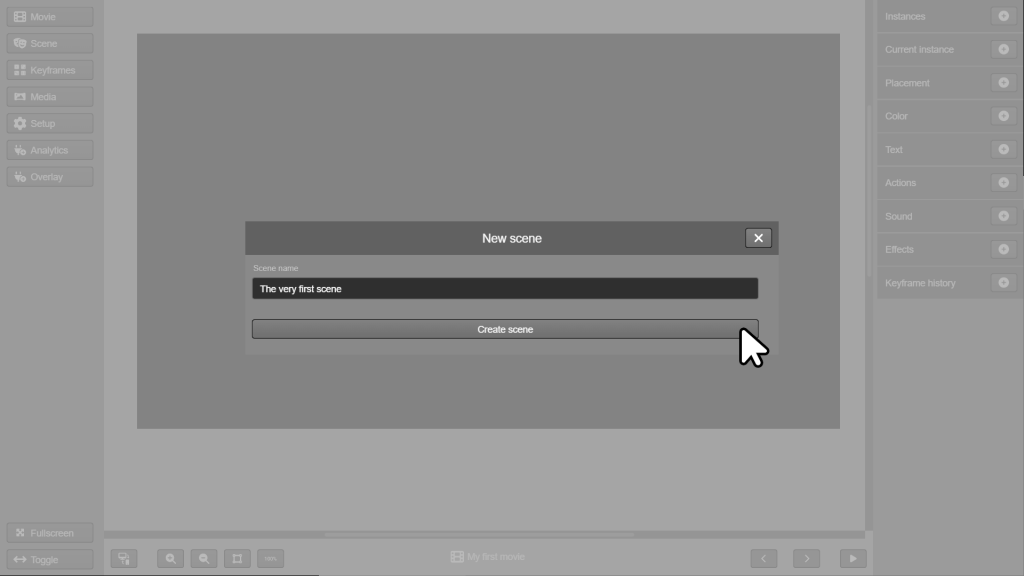
Think of a very creative title for your first scene. After typing it, click Create scene. Notice that the name of your scene appears next to the movie title at the bottom of the screen.
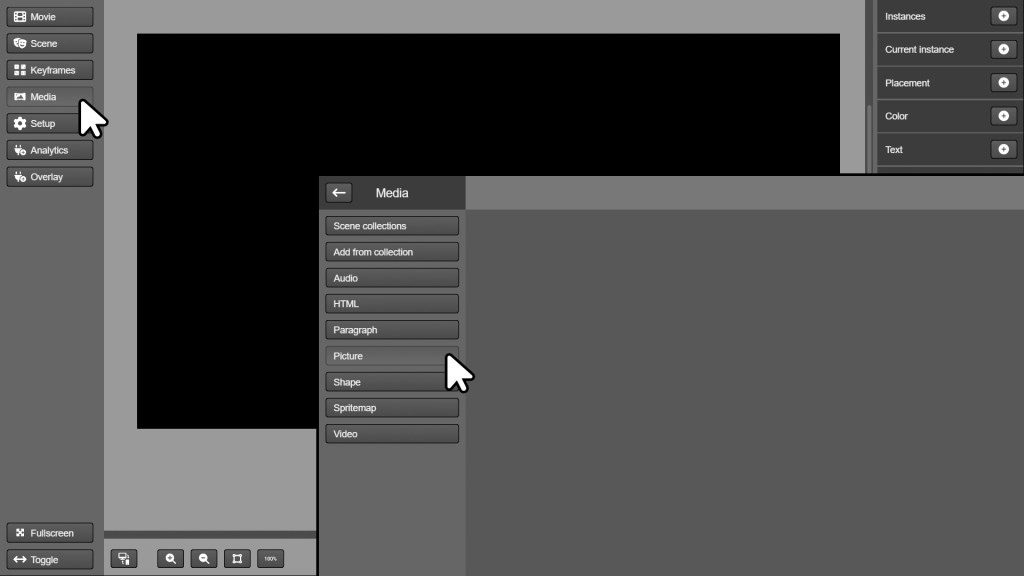
Now, let’s add an image to our scene. In the left menu, click Media > Picture.
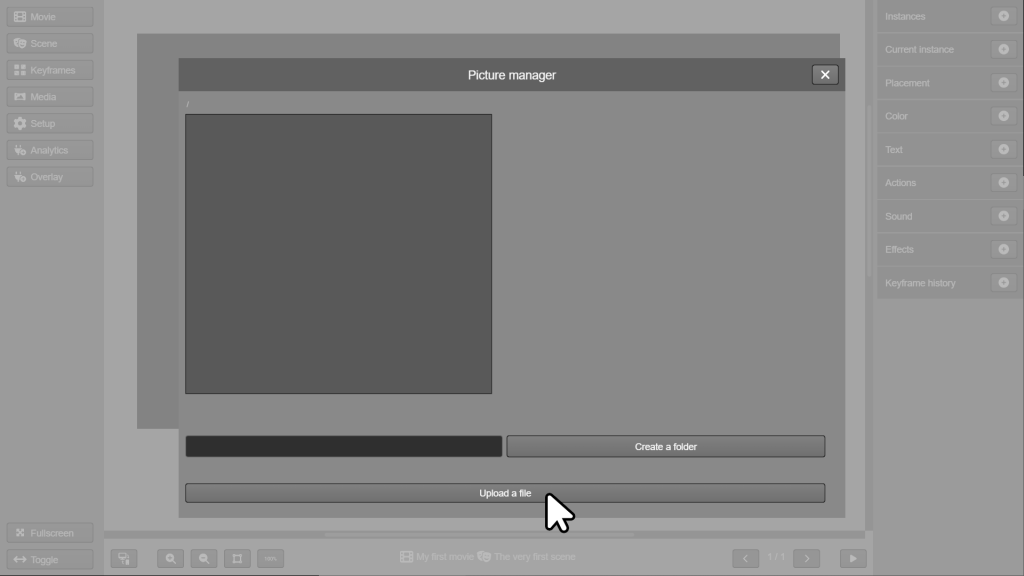
The image manager will appear. There, click Upload a file to select a file from your computer. You may use this file.
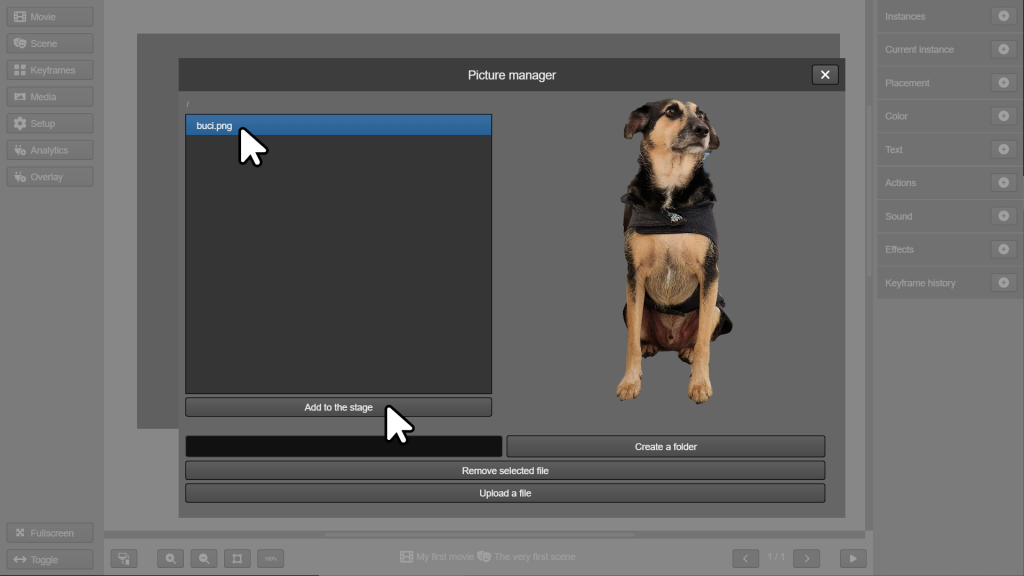
After the file is uploaded, click on its name in the list so that the image appears in the manager. After that, click Add to stage to add it to the scene.
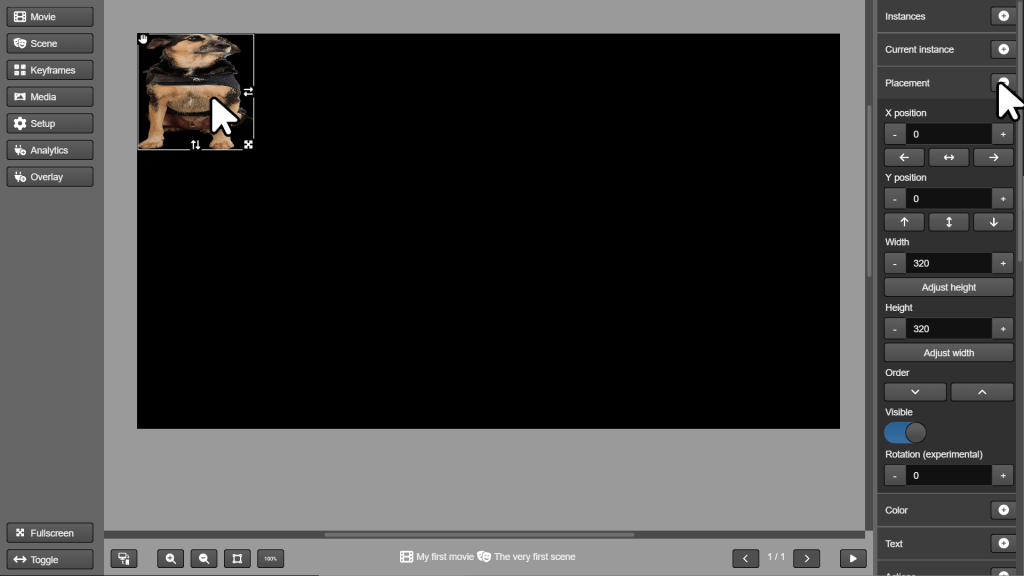
Congratulations! You’ve just added your first image, but it doesn’t seem quite right, does it? Click on it to select it and, in the menu on the right, click on the + button next to Placement.

You can manually drag and resize the image, but for now, what about using the properties in the menu on the right? Click on the Width value and change it to 320. Then click on the Adjust height button below so that the image is proportional. To finish, click on the center buttons just below the X position and Y position values.
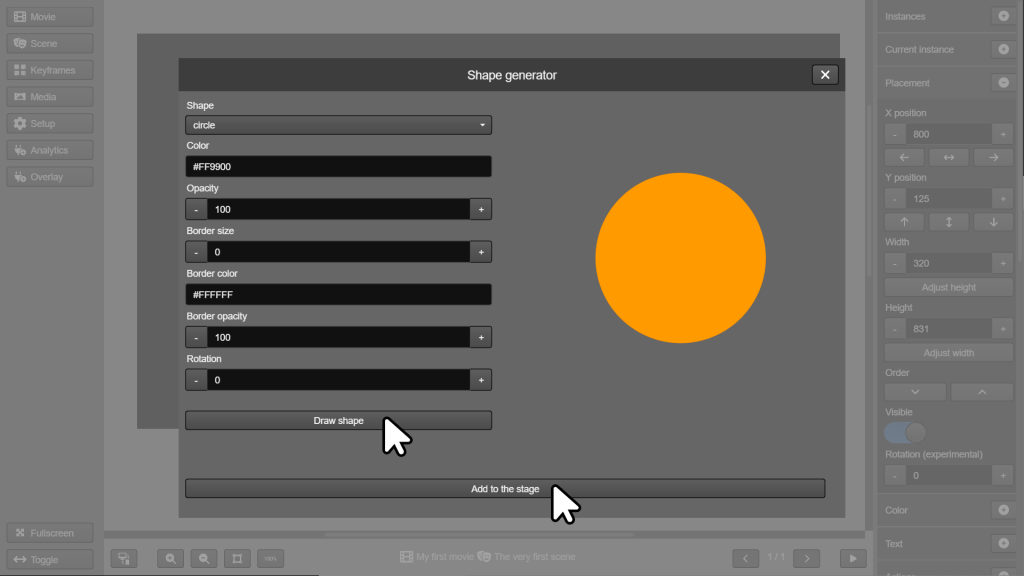
How about adding a highlight to our photo? To do this, go to the left menu and click on Media > Shape. The shape generation window will appear. Keep the circle shape, but change the color to orange, as shown in the image (use hexadecimal values). Once done, click on the Draw shape button to check and then on Add to the stage.
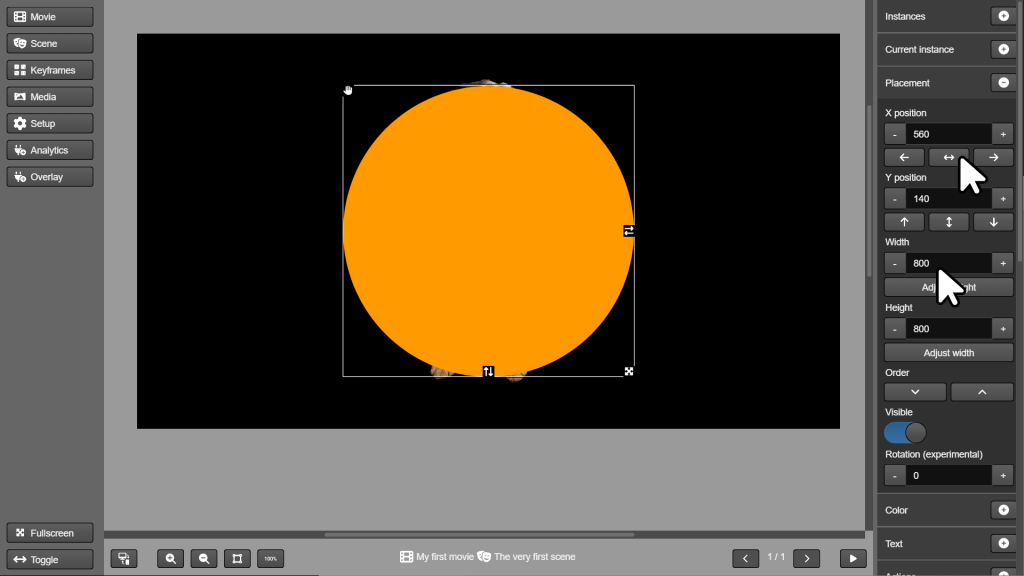
After adding, select the circle image and change the size to 800 (Width) x 800 (Height). After that, center it as you did with the previous one. Oops… something didn’t look good, the image appeared on top of the photo!
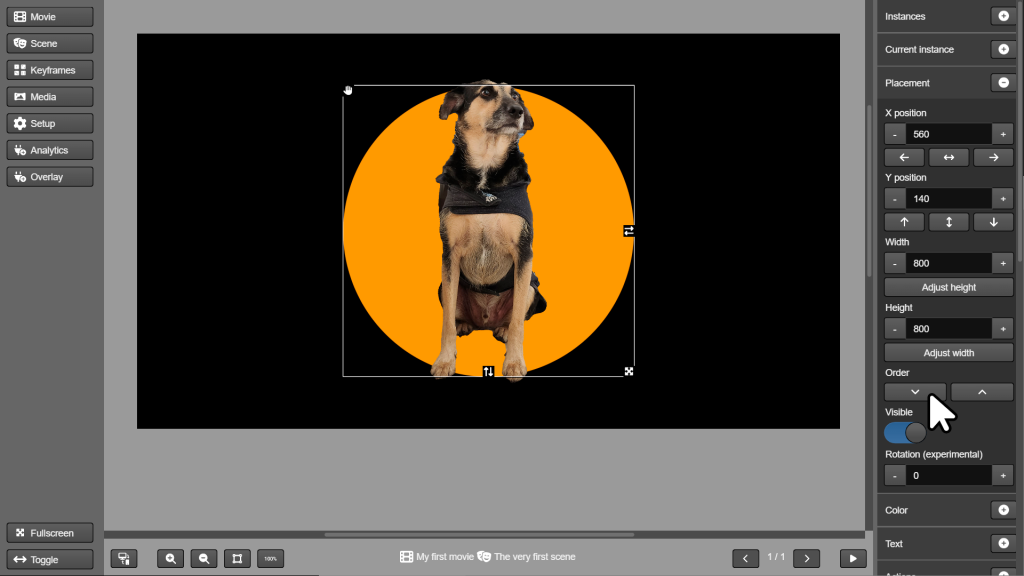
Keeping the circle selected, click the button to decrease the order. This will rearrange the images.
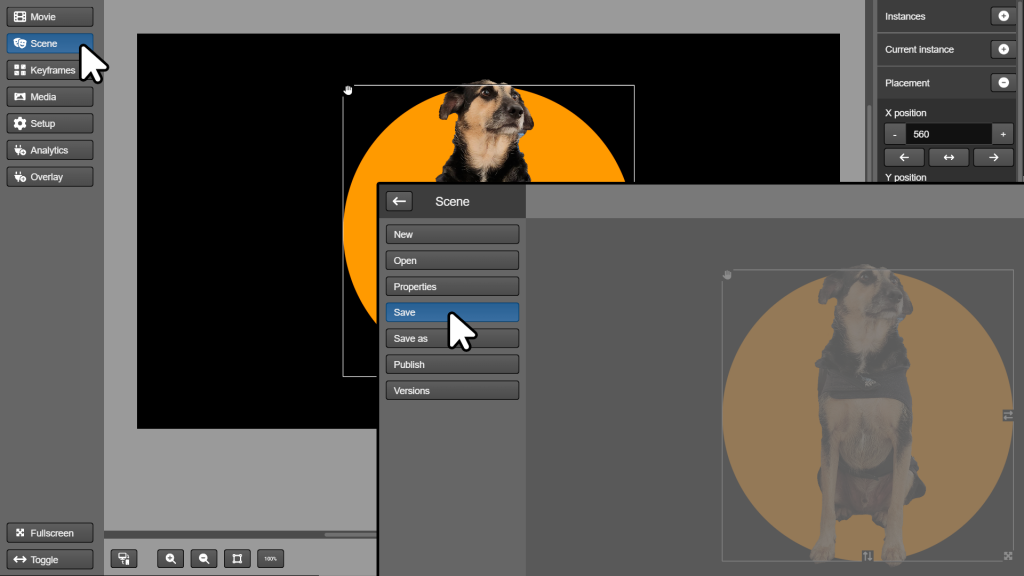
This is a good time to record the work you’ve done so far. In the left menu, go to Scene > Save. When the recording ends, you will see a success message at the bottom of the screen.
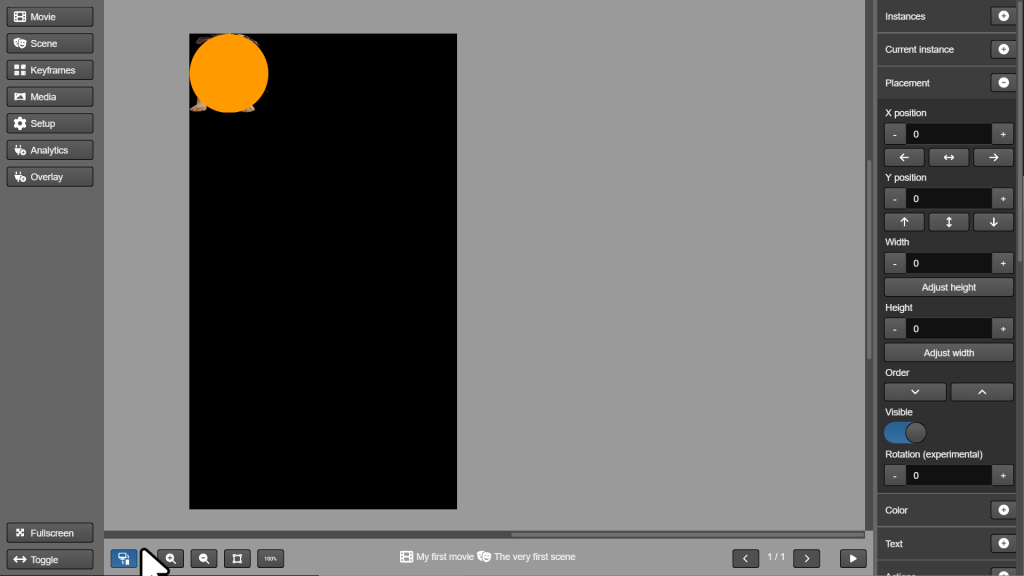
So far we have only diagrammed the horizontal screen of your scene. It’s time to check out how it will look on vertical screens, like those on mobile phones. Click the swap button at the bottom of the screen. You will see that the images are still in their original sizes and positions.
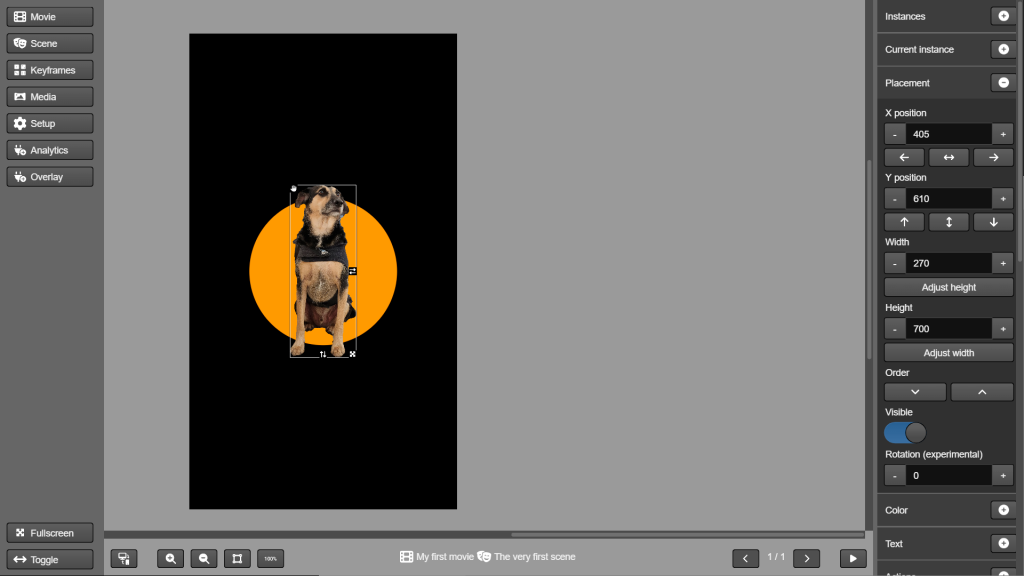
Set the photo size to 270×700, at position 405,610 (centered). For the circle, adjust the size to 600×600 and also center it. If necessary, also adjust the order. The layout of each screen format is independent.
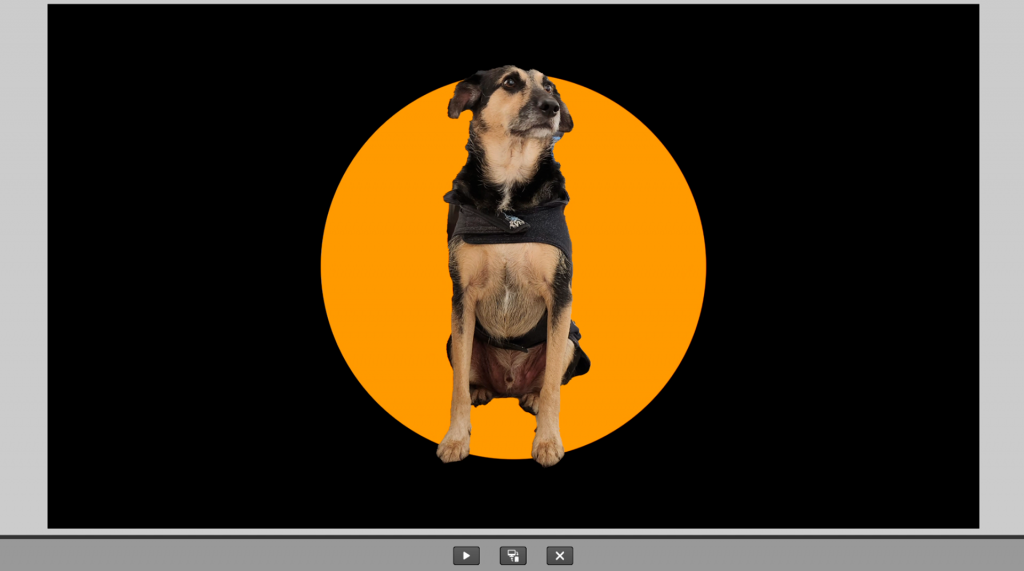
You can check your scene at any time by pressing the play button at the bottom of the screen. In the preview window you can check both the horizontal and vertical behavior.
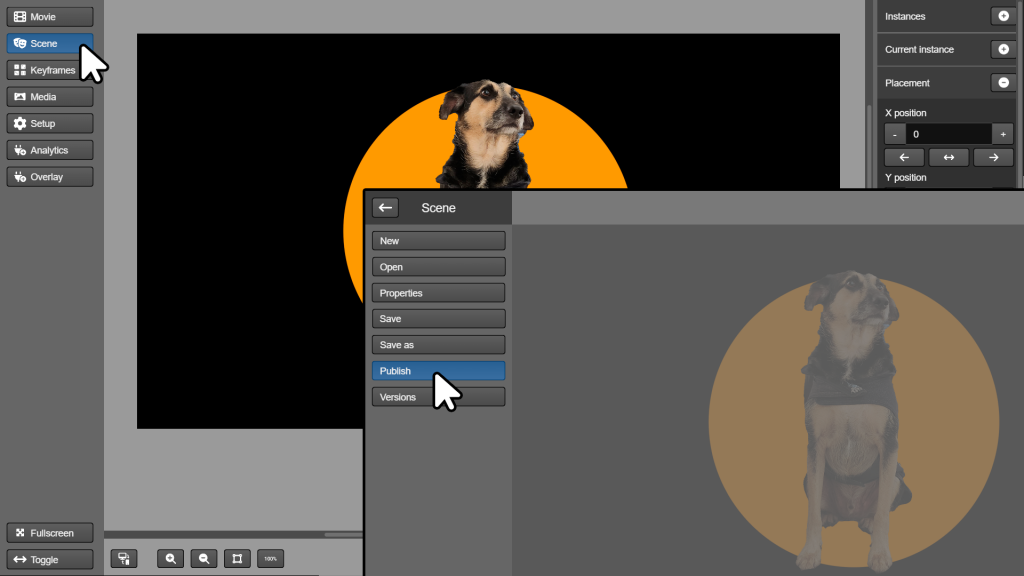
Once you’re happy with your scene, go to the left menu and click Scene > Publish. In addition to saving, this will make the current version available to be accessed.
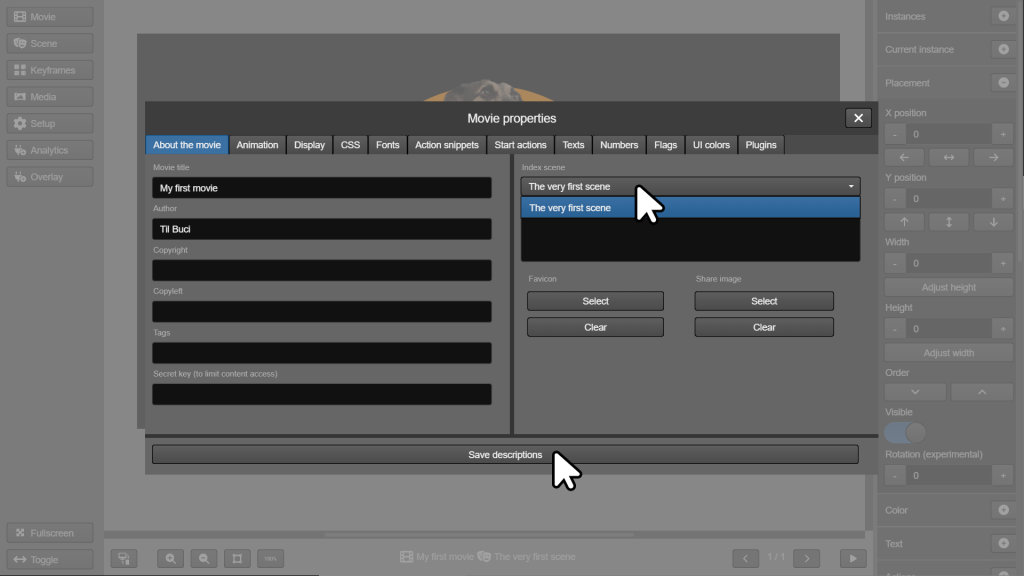
But there are still two adjustments to make. First, go to the left menu and select Movie > Properties. In the properties window choose your scene as the index. The index scene is the first to be played when the movie opens. Click the Save descriptions button to save this configuration.
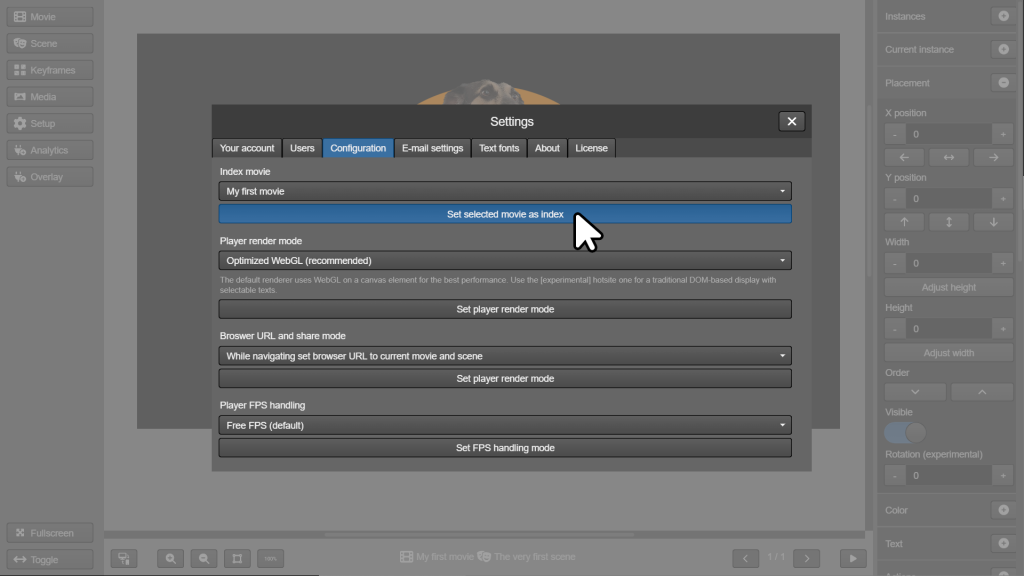
Then click the Setup button in the left menu to show the general settings window. Go to the Configuration tab and select your movie as index and click on the Set selected movie as index button.
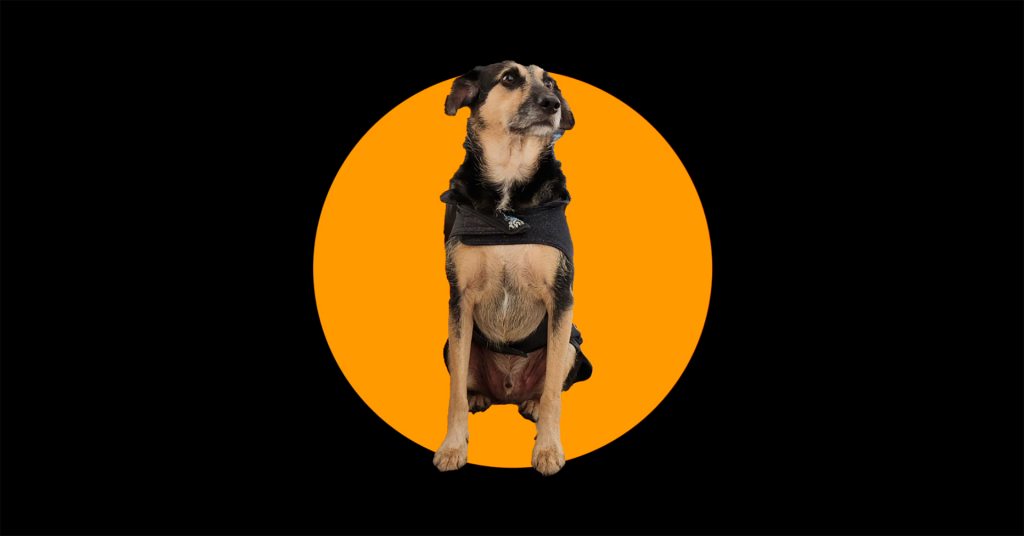
Now, just access the /app path of your TilBuci installation to see the results.
Our work today was great! You learned how to create a TilBuci movie, prepare a scene, and add media. Keep following the tips in our videos to become a master in the art of digital publishing in no time!
